La Roche Posay Effaclar Duo [+]|Review

Hey!

Screen Shot 2015-08-14 at 23.05.09

I thought I would share with you guys my thoughts on La Roche Posay’s Effaclar Duo [+]. This is one of my all time favourite face treatments and with my skin type being combination oily and blemish-prone, it’s the perfect treatment!


The Formula

The new ‘plus’ formula has the addition of an ‘Anti-Marks‘ claim compared to the original Effaclar Duo. It’s amazing at reducing the appearance of acne scars or redness on the face, with noticeable differences in no longer than 10 days! It’s a great cream based product and doesn’t leave a greasy residue, containing an effective amount of the topical disinfectant benzoyl-peroxide. It also contains the antioxidant vitamin E which works as an anti-irritant to help reduce blemishes and scars. It has a slightly fresh scent, which I prefer way more than any other benzoyl peroxide based product that can sometimes smell of detergent.


How it’s Worked for Me

As my skin type is combination oily and blemish-prone, this treatment has been a lifesaver! I have been using this for around a year now on an ‘on and off’ basis when I come across scarring on my face. I have seen noticeable differences in my skin and have received so many compliments on my skin with people asking what I’ve been using.

I also find that this treatment works really well as a base for my make up, or as a make up primer. I always use it before starting my make up and it provides a really smooth feel when applying my foundation or tinted moisturiser.

I apply this in the morning after cleansing and also at night after removing my make-up. I feel that it can sometimes be slightly drying so I would add the teeniest amount of coconut oil which helps to moisturise and hydrate my skin.

With its gel-ish formula, it is surprisingly lightweight on the skin and it’s kept my skin feeling well-nourished and hydrated. It has a lovely calming sensation so even if a blemish is about to appear, it will reduce the breakout by keeping the area calm and clean.


The Packaging

I love the tube packaging with a tiny needle nosed dropper making it super hygienic. It’s really easy to apply and you only need a pea-sized amount for the whole face. Each tube has 40 ml of product and it does tend to finish quite quickly if you were to use it everyday, so it can be quite expensive to repurchase.


Pros

  • Contains medicated anti-acne ingredient: Benzoyl Peroxide
  • Reduces redness and appearance of scars
  • Works amazingly as a primer
  • Fragrance-free
  • Oil-free
  • Great spot treatment

Cons

  • Expensive for the quantity
  • No SPF
  • Need quite a lot to use as a moisturiser

Overall

Although I still have a few small blemishes and scars, they have reduced and faded dramatically and there has been a massive improvement in the overall state of my skin. I would highly recommend this product to anyone who is looking to reduce the appearance of scars or dark spots. I love this though, and really haven’t found any treatment which works as well as this does at reducing scarring. Even prescribed treatments from the GP haven’t worked as well as this does – they would always tend to dry out my skin and leave it with a flakey residue.


Other La Roche Posay Products

La Roche Posay ~ 3 Step Effaclar Anti Blemish System

Screen Shot 2015-08-14 at 23.10.30

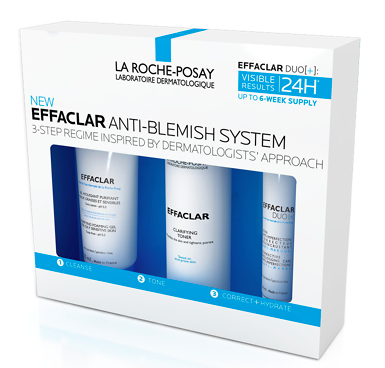
After experiencing the amazing effects of the Effaclar Duo [+], I decided to try out the Effaclar Anti Blemish System. This comes with a Purifying Foaming Gel, Clarifying Toner and Effaclar Duo [+]. To be completely honest, I felt like the cream worked best on my skin and didn’t seem to notice a huge difference with the other products, which is why I didn’t feel it necessary to write a full review on the whole system.


Screen Shot 2015-08-14 at 23.11.17

La Roche Posay ~ Serozinc

This zinc water formula gives an amazing, calming and hydrating feeling to the face and really helps at reducing blemishes! I’m going to be doing a full review on this soon so watch this space 🙂


I’d love to hear your thoughts on Effaclar Duo [+]? What other La Roche Posay products have you tried that are worth a go?

I’d love to know in the comments below 🙂


Sachita x

Advertisement

My Everyday Makeup Routine

Hey!


This blog post has been highly requested and I have finally come around to writing it. My daily make up routine changes quite regularly and sometimes I tend to use different products depending on my mood and quite importantly, the changes in weather – the weather in the UK is totally unpredictable! I tend to have the same staple items in my make up bag like my primers and setting bases but I love to play around with mascaras, blushes and lipsticks – still gravitating towards the nude shades for everyday.


Step 1 – Prime

IMG_5829 IMG_5830 IMG_5832

I first spray a light mist of the Skindinavia Makeup Primer Spray – For more info on this check out my July Favourites post. Followed by the amazing Smashbox Photo Finish Blemish Control Primer. I take a pea sized amount on my hands and rub it into my face like a moisturiser. My skin type tends to be quite prone to blemishes and honestly this primer is great to minimise and control the oil on my face when I have blemishes. It’s super lightweight and really helps your make up to stay in place all day, paired with the Skindinavia!


Step 2 – Base

IMG_3099 IMG_7471

IMG_2900 IMG_8913

IMG_4687 IMG_7040

Starting with my holy grail of foundations – MAC Studio Fix Fluid – NC44.5I apply this all over my face with my Real Techniques Buffing Brush from the Core Set. This is a medium to full coverage foundation and it’s very build able so depending on how much coverage I need, I apply accordingly. On a good skin day, I apply my favourite tinted moisturiser – NARS Pure Radiant Tinted Moisturiser – SeychellesThis tinted moisturiser is really great! It gives a lightweight, “barely there” feeling and great for everyday. It doesn’t transfer, and has a radiant, slightly dewy finish which is perfect for a natural look.

Dusted over with the Mac Studio Fix Powder Plus Foundation – NC45, it sets a great base with a bit of extra coverage for the redness that may not be perfectly covered up.


Step 3 – Conceal

IMG_8446 IMG_3631

IMG_8899 IMG_8205

My absolute favourite concealer – NARS Radiant Creamy Concealer – CaramelI apply this in a triangle shape under my eyes and take it along the centre of my nose, the centre of my forehead and a touch on my cupid’s bow. I love the Zoeva 110 Face Shape Brush to blend this in and sometimes use a damp Beauty Blender when I want a lighter coverage.

Setting my concealer with the famous Ben Nye Banana Powder, I tend to apply this with my beauty blender and leave it to ‘bake’ until I have finished my eye makeup. By baking, I receive a longer lasting coverage and a more matte finish with prevented creasing.


Step 4 – Brows

IMG_6855 IMG_2087

I love using the Dip Brow Pomade by Anastasia Beverly Hills in Dark Brown for an everyday brow. The shade dark brown matches my brow hairs perfectly and the smallest amount on a Zoeva 317 Angle Liner Brush picks up the perfect, tiniest amount to complete my brows with two or three dips.

If i’m in a mad rush (most days), I grab the Brow Wizz also by Anastasia Beverly Hills in Dark Brown. One side has a spoolie and the other side, a retractable pencil. I run this through my brows a few times, filling in the gaps, go over with the spoolie and i’m set!


Step 5 – Eyes – Shadow

IMG_3979 IMG_8091

IMG_5833

Going for a natural everyday look, I like to take the colour ‘semi-sweet’ from one of my favourite palletes – Too Faced Chocolate Bar. I take this colour (3rd in the 2nd row) into my crease for some definition, using my Zoeva 231 Luxe Petit Crease Brush. I tend to just leave it at that with my shadow for an everyday look.


Step 6 – Eyes – Liner

IMG_1608

Depending on whether I want a bold or subtle liner look that day, I tend to use different products. I love using the cult  favourite INGLOT Eyeliner Gel #77 to create a bold and sharp wing using the Zoeva 317 Wing Liner Brush. I would set the gel with the L’Oréal Super Star Super Liner – a felt tip black liner with a sharp tip.

If i’m going for a more subtle look, the Kat Von D Tattoo Liner in Trooper is a great choice! For a full description check out my July Favourites post.

For my lower waterline, I take the NYX Wonder Pencil and run it across to open up my eyes (July Favourites). The Rimmel Special Eyes Pencil Eyeliner Pencil in Black Magic is so great to go along my bottom lash line and I usually smudge this out with the Zoeva 226 Smudger Brush which is great at creating a natural smokey look.


Step 7 – Eyes – Mascara

IMG_4923

Mascara is a must for me and I love to create a “mascara cocktail” to create the perfect lash look! Check out my post, My Fave Mascaras, for a full review on each mascara.


Step 8 – Contour & Highlight

IMG_5394 IMG_1293 IMG_7020 IMG_1275

After brushing off the excess Ben Nye Banana Powder from my undereyes, I take the Real Techniques 301 Flat Contour Brush with the Sleek Makeup Face Form in medium and use the darkest shade to contour under my cheekbones. I love this brush as it gives such a precise contour!

To highlight, I have recently been loving the Make Up Forever Pro Sculpting Duo and the golden highlight is magical! (July Favourites). I feather that onto the highest points of my face using the Sigma E40 Brush; just above my cheekbones, my cupids bow, the brow bones and the tip of my nose.


Step 9 – Blush

IMG_3361 IMG_8383

For blush, my go to, everyday shade is the INGLOT Face Blush #41 (July Favourites). It’s a perfect, natural shade and brings a subtle pop of colour to my, usually tired looking, face in the morning haha!


Step 10 – Lips

IMG_4347 IMG_0046

Lipstick finishes off this look with a transformation! The difference my make up looks with a touch of colour on my lips is incredible! I love to go for the nude shades for an everyday look and my favourites are: MAC Retro, MAC Amorous (for a more summery day), Gerard Cosmetics 1995 and NYX Soft Matte Lip Cream in Zurich


Step 11 – Finishing Spray

IMG_5841 IMG_5842 IMG_5843

Putting the whole look together, my go to Finishing Spray at the moment is the Skindinavia Makeup Finishing Spray but if i’m a bit more on the oily side, I tend to use the NYX Matte Finish Spray. Both are great and leave my make up lasting all day with no movement.


That comes to the end of my Everyday Makeup Routine, hope you guys enjoyed reading! Sorry it was really long, but I didn’t want to miss any steps.

It would be great to know your guys’ everyday makeup routines in the comments or if you like or use any of the products I use, let me know your thoughts 🙂

Sachita x