My First Blogger Milestone – DSLR!

Hey!

After months and months of research and endless visits to my local tech shops, I have finally pulled the trigger and purchased my first DSLR – I’ve reached it! My first blogger milestone! I am so excited about this purchase and cannot wait to start using it! As it’s my first camera, I wanted something that was quite compact but I also wanted the option of different lenses and a tilt screen. That’s why I opted for the Olympus Pen EPL-6 and I feel that it’s so perfect for blogging and vlogging!

I’m going to keep this post short and just tell you a few features of the camera that I looked into when buying the camera. As I haven’t used it much, I’m yet to form a full review but will definitely review this camera once I figure it out properly! As for now, I love it, and you guys can help me be the judge as most of my photos from now, will be taken with this camera 🙂


Some pics 🙂

hi_ol13

IMG_6893 IMG_8268 IMG_2624

IMG_7407 IMG_7883


Features:

  • 3″ LCD tilt, touchscreen – tillable through 135 degrees and perfect for vlogging and selfies!
  • Small External Flash
  • 2 Zoom Lenses – 14-42mm and 40-150mm
  • 12 Art Filter Lenses
  • WiFi and GPS Compatible
  • 200 – 25600 ISO range provides the sensitivity you need for clear, dynamic shots in many lighting conditions
  • Price: £289 – got a bargain at PC World

Z-OLYMPUS-EPL6-TOP

Z-OLYMPUS-EPL6-BACK-600


It takes high quality photos with great focus and face recognition. Also really good for landscaping when on holiday and compact so super travel friendly. Do any of you guys have this camera or tried it out? How did you like it? 🙂


Sachita x


Advertisement

Blogger Recognition Award

Hey!

First of all I’d like to thank Bhavika for nominating me for this award! Please take a minute check out her blog here.
bloggerrec_award

Blogger Recognition’ Award Rules:
1)  Select 15 other blogs you want to give the award to. Do some digging if you must! Find those blogs. You cannot nominate yourself or the person who has nominated you.

2) Write a post to show off your award! Give a brief story of how your blog got started, and give a piece or two of advice to new bloggers. Thank whoever nominated you, and provide a link to their blog. List who you’ve nominated in the post. Make sure to also attach the award itself! (You can do this by right-clicking, saving, and uploading the image above).

3) Comment on each blog and let them know you’ve nominated them. Provide a link to the award post you created


My Nominations

  1. With All My Affection
  2. Meika & Me
  3. Prettify Your Life
  4. That Pommie Girl
  5. Aubergine Reverie
  6. The Daily Cup
  7. Beautiful Hello
  8. A Girl Obsessed
  9. All About Ashni
  10. Thumbelina Lillie
  11. Sophia Meola
  12. Lydia Rose
  13. The Sartorial Coquette
  14. Sprinkle of Surprise
  15. Makeup by Makena

How I Started My Blog and A Few Pieces of Advice

It’s been nearly 2 months now since I started my blog and I can’t believe the amazing feedback and support I have received from it! I feel so grateful to everyone who takes a moment to read my posts and I honestly just love inspiring others with my posts.

I initially started this blog as a more regularly way to post about the things I love, as compared to my Youtube Channel where I would not post as often. As I have been working throughout my summer this year, I have hardly had any time to film and edit videos and thought that starting a blog would be the best way to keep up with the latest trends and talk about my favourite topics. Making this blog has been one of the best decisions I’ve ever made!

For advice, if any of you out there are reading this right now and are in two minds whether to start blog or not, I’d say do it! Don’t hesitate and don’t look back, it’s a great decision and once you get into the flow of things it’ll become a lot easier! Believe in yourself!

As I’m pretty new at this myself, I’ll leave the professional advice to the experts. Right now I’m still learning and there’s such an amazing and wide platform out there in the blogging world that is yet for me to discover! I can’t wait!

Please don’t forget to check out my nominations and to mention me in your posts 🙂 Thank you again to Bhavika who has been one of my constant supporters in the blogging world 🙂


Sachita x

Amazing Beauty Tricks with Coconut Oil

Hey!

IMG_06341

You may have already made the switch to virgin coconut oil for use in the kitchen, but did you know you can also switch up some of your beauty products for this wonder oil? This do-it-all ingredient can be used as skin moisturiser, makeup remover, exfoliant and so much more. It’s been around 2 to 3 years since I’ve been using virgin coconut oil and about three jar-fulls to be completely convinced of it’s benefits! Here’s the ways you can incorporate virgin coconut oil into your beauty routine 🙂

Make sure to use Virgin Coconut Oil for the best results as its 100% natural. I usually use Tiana The World’s Premier Extra Virgin Coconut Oil

076228_A


Hair Mask/ Deep Conditioning

Applying a tablespoon-sized dollop onto your hair and really working it into those ends and the scalp, leaving it on for around 20 mins minimum (the longer you leave it the more nourished your hair becomes – I tend to leave it on overnight) and washing it off with shampoo, will add moisture and shine into those limp locks.

Alternatively, after shampooing apply the oil to the ends of wet hair and leave on for around 5 minutes before rinsing giving you a great quick fix with a more hydrated and shiny look.


Frizz Fighter

Rub a pea-sized amount between your fingers to warm it up and apply it to the ends of your hair for all day frizz protection. It also leaves hair super soft and hydrated!


Body Oil

Coconut oil tends to come as a solid in a jar and because of this, it’s creamy, light texture makes for the perfect moisturiser to apply all over your body. Just by taking a finger-full amount for each part of the body and letting it sink into your warm skin when coming straight out of the shower, makes the perfect hydrant for your skin. Using this routine every other day and switching with a cream based moisturiser, would give the oil a couple days to penetrate through the skin before applying it again.


Body Scrub

Mix half a cup of sea salt or brown sugar and an equal amount of coconut oil and use your hands to circulate it around any dry patches on the skin. It removes all the dead skin cells, leaving your skin feeling baby soft and its super inexpensive! Add a few drops of vanilla extract, or your favourite essential oil to give your scrub a gorgeous tropical scent.


To Remove Eye Make-Up

One of my favourite, go-to eye make-up removers and yes, it works on waterproof mascara too! I usually remove the make up on my face first with Micellar Water and then move onto the eyes. Taking some liquified oil onto my fingertips and slathering it over my lashes and eyelids, I leave it there for around a minute and watch the makeup melt away haha. Taking a cotton pad, I gently sweep it over my eye to pick up all the make up and it really does come off in one swipe! Rinse with warm water and your done!

Another amazing benefit is that it hydrates your under eye area, preventing under eye bags and dark circles and also helps to increase hair growth on your lashes and brows 🙂


Acne Scarring

Coconut oils is so great at reducing the darkness of acne scarring. Taking a pea-sized amount and moisturising it into your face before going to sleep, really shows results in one week! You’re probably thinking, why would I put an oil on my face if I have acne?! But coconut oil mimics your skins natural oil with less of a chance of clogging pores. It helps to cool down the skin and reduce inflammation and therefore reduces the amount of toxins produced, stopping oxidation so the acne scars heal quicker 🙂


Lip Balm

Chapped lips won’t stand a chance against super hydrating coconut oil. Dap some over your lips before you go to sleep and wake up with hydrated, plump and super soft lips! It makes lipstick application so easy!


Highlighter

Now I haven’t actually tried this one, but I’ve heard that it works really well as a highlighter so I thought I would suggest it. Taking the tinniest amount and sweeping it across the tops of the cheekbones, cupids bow and centre of the nose for hydrated skin which glows from within. A lot of natural make-up brands use coconut oil as a base in their formulas, so it must really work!


Shaving Cream

Forget the store-bought shaving creams! With coconut oil’s skin-soothing properties, your razor will glide so smoothly allowing for a close shave and your legs will be moisturised in the process. I would usually shave out of the shower when using this as it can get quite slippery and combined with water, things could get a bit messy haha. It’s inexpensive, antimicrobial and leaves a lovely tropical scent!


Do you guys use coconut oil? What do you like to use it for?


Sachita x

My Fave Blushes ❤️

Hey!

IMG_2612

Following on from my post on ‘My Favourite Mascaras‘, I thought I’d continue this short series and write the second post on my favourite blushes, as requested 🙂 My current MAC foundation shade is NC44.5 so I would say I have a medium-tan skin-tone shade, just so that you have an idea of the shades of the blushes.

IMG_3692

Ingot Face Blush #41

IMG_4167 IMG_5198 IMG_2145

As mentioned in my July Favourites post, one of my all time favourite everyday blushes is the  INGLOT Face Blush #41

INGLOT have such a great range of colours and with their unique Freedom System, it allows you to mix and match colours and products to custom design your own palette. This way you can experience their massive range of colours and pick and choose your favourites! They also come as individual face blushes like you can see in the photos above.

It’s a gorgeous matte brown-red shade and great for summer – it’s so long wearing and gives a smooth application. I usually use the Real Techniques Blush Brush to apply this. It gives a nice healthy glow to the face and paired with a gorgeous highlighter, it creates great dimension on the face. I love it!

MAC Sheertone Shimmer Blush – Peachtwist

IMG_6678 IMG_0214

Although a shimmery blush, MAC’s Peachtwist gives the perfect amount of pigmentation for a natural look. It actually creates more of a light sheen rather than a shimmer to your cheeks which can be blended for a sheer look or built up for a more shimmery look. I usually pair this with the INGLOT #41 above, or the NYX Bordeaux below, applying this underneath for a slightly more matte look as I typically go for matte blushes during the day.

As I have more of a medium-tan skin tone, I would think that this blush, being a rosy, peach colour with a subtle gold sparkle, may be slightly too strong for those who have a fairer skin-tone, in which case this blush can be blended out to create more of a rosy glow on the cheeks.


Milani Baked Powder Blush – Rose D’Oro #02

IMG_3581 IMG_0834

I love the Milani Baked range, as I mentioned in my July Favourites post, the baked blushes were the first Milani products I tried. With them being super inexpensive I found myself in possession of three of the Baked Blushes; Milani Rose D’Oro, Milani Berry Amore and Milani Red Vino. I am obsessed with all three of these, but the one I tend to reach for most is the Milani Rose D’Oro, just because it’s great for a more natural look and the others can sometimes be a tad intense so I tend to save those for nights out 🙂

They have such a beautiful, silky texture and easy application. Rose D’Oro is very shimmery with an immediate swatch, but once blended it can also create a lovely sheen just like the Peachtwist above. It can be built up to look vibrant as well, and can be used for a beautiful highlight on the hight points of the face. With its golden shimmer, it looks great on more of a tanned skintone and can be paired with a matte blush for a more subtle, everyday look.


NYX Powder Blush – Bordeaux

IMG_6023 IMG_6024 IMG_6025

NYX Powder Blush in Bordeaux is a deep red-brown with a slight shimmer in the pan but actually goes on the cheeks matte! This blush paired with MAC Retro Lipstick is such a nice combo! Although a slightly darker shade, once blended the colour looks stunning on! I love the NYX formula and the fact that their products are very affordable.

I purchased this blush at IMATS (see my haul video here) and as there were no testers at the NYX stand, I was unable to go in for a quick swatch, but thank god I picked it up! It’s another of my go to blushes and again, like the INGLOT #41, perfect for everyday. I find that I would wear this on less of an oily-skin day or if I don’t have any blemishes on my face, as the slight shimmer in the pan can tend to come through after a few hours of wear.


Benefit Rockateur

IMG_6021 IMG_6020 IMG_3262

As you may have already noticed, I love anything Rose Gold! The Benefit Rockateur is one their many Box O’ Powders and of course is rose gold in colour. I just find that rose gold compliments my skin tone really well and am always drawn to it, whether it be in make up or jewellery.

The Rockateur generates a healthy flush that brightens up the complexion without being overly shimmery and this one is actually great for all skin-tones! As the colour is build-able, just like most of the other blushes I have mentioned, it can be taken from day to evening really easily. It goes on like a light cream product but is actually a finely-milled powder, creating a lightweight feel to the face. It also comes with a small brush inside making it very travel-friendly. This blush with a gorgeous natural, but lengthened lash using the Roller Lash is perfect!

Another thing I love about this blush is the packaging! I mean look at the packaging! Isn’t it gorgeous?! I’m such a sucker for beautiful packaging haha.


Please let me know your thoughts if you’ve used any of the blushes I have mentioned, and I’d love to know your favourite blushes in the comments 🙂


Sachita x

La Roche Posay Effaclar Duo [+]|Review

Hey!

Screen Shot 2015-08-14 at 23.05.09

I thought I would share with you guys my thoughts on La Roche Posay’s Effaclar Duo [+]. This is one of my all time favourite face treatments and with my skin type being combination oily and blemish-prone, it’s the perfect treatment!


The Formula

The new ‘plus’ formula has the addition of an ‘Anti-Marks‘ claim compared to the original Effaclar Duo. It’s amazing at reducing the appearance of acne scars or redness on the face, with noticeable differences in no longer than 10 days! It’s a great cream based product and doesn’t leave a greasy residue, containing an effective amount of the topical disinfectant benzoyl-peroxide. It also contains the antioxidant vitamin E which works as an anti-irritant to help reduce blemishes and scars. It has a slightly fresh scent, which I prefer way more than any other benzoyl peroxide based product that can sometimes smell of detergent.


How it’s Worked for Me

As my skin type is combination oily and blemish-prone, this treatment has been a lifesaver! I have been using this for around a year now on an ‘on and off’ basis when I come across scarring on my face. I have seen noticeable differences in my skin and have received so many compliments on my skin with people asking what I’ve been using.

I also find that this treatment works really well as a base for my make up, or as a make up primer. I always use it before starting my make up and it provides a really smooth feel when applying my foundation or tinted moisturiser.

I apply this in the morning after cleansing and also at night after removing my make-up. I feel that it can sometimes be slightly drying so I would add the teeniest amount of coconut oil which helps to moisturise and hydrate my skin.

With its gel-ish formula, it is surprisingly lightweight on the skin and it’s kept my skin feeling well-nourished and hydrated. It has a lovely calming sensation so even if a blemish is about to appear, it will reduce the breakout by keeping the area calm and clean.


The Packaging

I love the tube packaging with a tiny needle nosed dropper making it super hygienic. It’s really easy to apply and you only need a pea-sized amount for the whole face. Each tube has 40 ml of product and it does tend to finish quite quickly if you were to use it everyday, so it can be quite expensive to repurchase.


Pros

  • Contains medicated anti-acne ingredient: Benzoyl Peroxide
  • Reduces redness and appearance of scars
  • Works amazingly as a primer
  • Fragrance-free
  • Oil-free
  • Great spot treatment

Cons

  • Expensive for the quantity
  • No SPF
  • Need quite a lot to use as a moisturiser

Overall

Although I still have a few small blemishes and scars, they have reduced and faded dramatically and there has been a massive improvement in the overall state of my skin. I would highly recommend this product to anyone who is looking to reduce the appearance of scars or dark spots. I love this though, and really haven’t found any treatment which works as well as this does at reducing scarring. Even prescribed treatments from the GP haven’t worked as well as this does – they would always tend to dry out my skin and leave it with a flakey residue.


Other La Roche Posay Products

La Roche Posay ~ 3 Step Effaclar Anti Blemish System

Screen Shot 2015-08-14 at 23.10.30

After experiencing the amazing effects of the Effaclar Duo [+], I decided to try out the Effaclar Anti Blemish System. This comes with a Purifying Foaming Gel, Clarifying Toner and Effaclar Duo [+]. To be completely honest, I felt like the cream worked best on my skin and didn’t seem to notice a huge difference with the other products, which is why I didn’t feel it necessary to write a full review on the whole system.


Screen Shot 2015-08-14 at 23.11.17

La Roche Posay ~ Serozinc

This zinc water formula gives an amazing, calming and hydrating feeling to the face and really helps at reducing blemishes! I’m going to be doing a full review on this soon so watch this space 🙂


I’d love to hear your thoughts on Effaclar Duo [+]? What other La Roche Posay products have you tried that are worth a go?

I’d love to know in the comments below 🙂


Sachita x

Indian Engagement Party |GRWM

Hey!

IMG_5900

Yesterday we had an Indian function for my cousin who just announced his engagement.

And of course, just like any other Indian function, a great excuse to glam up for the day! I wanted to show you guys my outfit of the day 🙂

So I decided to go for this beautiful royal blue outfit which is from Venisons in Wembley, London. It’s simple but elegant and quite ‘dress like’ so you don’t really need to wear it with the traditional “chundri” like most other anarkali outfits.

It has some gorgeous gold embellishments at the top and a netted layer on the bottom. This really gives that extra sparkle to the outfit – a must for every indian outfit imo haha!

IMG_5877 IMG_5878 IMG_5879

The bottom is also a very unique style with an asymmetrical netted layer and some gold material from the layer behind, peeping through from underneath.

This outfit is also great for an evening look and can be paired with a nice pair of gold sparkly heels to finish it off. I opted for a sensible pair of gold, flat sandals (of course with some silver diamantes :P) this time as I knew there’d quite a bit of running around to do – and i’m so glad I chose flats haha!

IMG_5905 IMG_5904


Wedding season is upon us – have you guys been getting glam recently? It would be lovely to see or hear about your outfits in the comments 🙂


Sachita x

My Everyday Makeup Routine

Hey!


This blog post has been highly requested and I have finally come around to writing it. My daily make up routine changes quite regularly and sometimes I tend to use different products depending on my mood and quite importantly, the changes in weather – the weather in the UK is totally unpredictable! I tend to have the same staple items in my make up bag like my primers and setting bases but I love to play around with mascaras, blushes and lipsticks – still gravitating towards the nude shades for everyday.


Step 1 – Prime

IMG_5829 IMG_5830 IMG_5832

I first spray a light mist of the Skindinavia Makeup Primer Spray – For more info on this check out my July Favourites post. Followed by the amazing Smashbox Photo Finish Blemish Control Primer. I take a pea sized amount on my hands and rub it into my face like a moisturiser. My skin type tends to be quite prone to blemishes and honestly this primer is great to minimise and control the oil on my face when I have blemishes. It’s super lightweight and really helps your make up to stay in place all day, paired with the Skindinavia!


Step 2 – Base

IMG_3099 IMG_7471

IMG_2900 IMG_8913

IMG_4687 IMG_7040

Starting with my holy grail of foundations – MAC Studio Fix Fluid – NC44.5I apply this all over my face with my Real Techniques Buffing Brush from the Core Set. This is a medium to full coverage foundation and it’s very build able so depending on how much coverage I need, I apply accordingly. On a good skin day, I apply my favourite tinted moisturiser – NARS Pure Radiant Tinted Moisturiser – SeychellesThis tinted moisturiser is really great! It gives a lightweight, “barely there” feeling and great for everyday. It doesn’t transfer, and has a radiant, slightly dewy finish which is perfect for a natural look.

Dusted over with the Mac Studio Fix Powder Plus Foundation – NC45, it sets a great base with a bit of extra coverage for the redness that may not be perfectly covered up.


Step 3 – Conceal

IMG_8446 IMG_3631

IMG_8899 IMG_8205

My absolute favourite concealer – NARS Radiant Creamy Concealer – CaramelI apply this in a triangle shape under my eyes and take it along the centre of my nose, the centre of my forehead and a touch on my cupid’s bow. I love the Zoeva 110 Face Shape Brush to blend this in and sometimes use a damp Beauty Blender when I want a lighter coverage.

Setting my concealer with the famous Ben Nye Banana Powder, I tend to apply this with my beauty blender and leave it to ‘bake’ until I have finished my eye makeup. By baking, I receive a longer lasting coverage and a more matte finish with prevented creasing.


Step 4 – Brows

IMG_6855 IMG_2087

I love using the Dip Brow Pomade by Anastasia Beverly Hills in Dark Brown for an everyday brow. The shade dark brown matches my brow hairs perfectly and the smallest amount on a Zoeva 317 Angle Liner Brush picks up the perfect, tiniest amount to complete my brows with two or three dips.

If i’m in a mad rush (most days), I grab the Brow Wizz also by Anastasia Beverly Hills in Dark Brown. One side has a spoolie and the other side, a retractable pencil. I run this through my brows a few times, filling in the gaps, go over with the spoolie and i’m set!


Step 5 – Eyes – Shadow

IMG_3979 IMG_8091

IMG_5833

Going for a natural everyday look, I like to take the colour ‘semi-sweet’ from one of my favourite palletes – Too Faced Chocolate Bar. I take this colour (3rd in the 2nd row) into my crease for some definition, using my Zoeva 231 Luxe Petit Crease Brush. I tend to just leave it at that with my shadow for an everyday look.


Step 6 – Eyes – Liner

IMG_1608

Depending on whether I want a bold or subtle liner look that day, I tend to use different products. I love using the cult  favourite INGLOT Eyeliner Gel #77 to create a bold and sharp wing using the Zoeva 317 Wing Liner Brush. I would set the gel with the L’Oréal Super Star Super Liner – a felt tip black liner with a sharp tip.

If i’m going for a more subtle look, the Kat Von D Tattoo Liner in Trooper is a great choice! For a full description check out my July Favourites post.

For my lower waterline, I take the NYX Wonder Pencil and run it across to open up my eyes (July Favourites). The Rimmel Special Eyes Pencil Eyeliner Pencil in Black Magic is so great to go along my bottom lash line and I usually smudge this out with the Zoeva 226 Smudger Brush which is great at creating a natural smokey look.


Step 7 – Eyes – Mascara

IMG_4923

Mascara is a must for me and I love to create a “mascara cocktail” to create the perfect lash look! Check out my post, My Fave Mascaras, for a full review on each mascara.


Step 8 – Contour & Highlight

IMG_5394 IMG_1293 IMG_7020 IMG_1275

After brushing off the excess Ben Nye Banana Powder from my undereyes, I take the Real Techniques 301 Flat Contour Brush with the Sleek Makeup Face Form in medium and use the darkest shade to contour under my cheekbones. I love this brush as it gives such a precise contour!

To highlight, I have recently been loving the Make Up Forever Pro Sculpting Duo and the golden highlight is magical! (July Favourites). I feather that onto the highest points of my face using the Sigma E40 Brush; just above my cheekbones, my cupids bow, the brow bones and the tip of my nose.


Step 9 – Blush

IMG_3361 IMG_8383

For blush, my go to, everyday shade is the INGLOT Face Blush #41 (July Favourites). It’s a perfect, natural shade and brings a subtle pop of colour to my, usually tired looking, face in the morning haha!


Step 10 – Lips

IMG_4347 IMG_0046

Lipstick finishes off this look with a transformation! The difference my make up looks with a touch of colour on my lips is incredible! I love to go for the nude shades for an everyday look and my favourites are: MAC Retro, MAC Amorous (for a more summery day), Gerard Cosmetics 1995 and NYX Soft Matte Lip Cream in Zurich


Step 11 – Finishing Spray

IMG_5841 IMG_5842 IMG_5843

Putting the whole look together, my go to Finishing Spray at the moment is the Skindinavia Makeup Finishing Spray but if i’m a bit more on the oily side, I tend to use the NYX Matte Finish Spray. Both are great and leave my make up lasting all day with no movement.


That comes to the end of my Everyday Makeup Routine, hope you guys enjoyed reading! Sorry it was really long, but I didn’t want to miss any steps.

It would be great to know your guys’ everyday makeup routines in the comments or if you like or use any of the products I use, let me know your thoughts 🙂

Sachita x

My Fave Mascaras ❤️

Hey! IMG_4796

Today’s post is going to be on my top mascaras that I like to use for everyday or when going out. Mascara is one of my favourite make-up items and it’s one of those products I just feel naked without! Haha

The other day, I was at my desk at work and realised I wasn’t wearing any mascara and honestly, I must’ve been in a serious rush because usually it’s something I never forget!


Benefit Roller Lash Mascara

IMG_8050 Screen Shot 2015-08-06 at 23.52.37

I resisted the hype on Benefit’s Roller Lash Mascara for a while, then caved haha. They’re Real held my love for Benefit mascara until Roller Lash. It holds a high curl and gives me separated and volumised lashes which is so good  for my lashes as they are quite long but very straight and hate holding a curl. This mascara really gives a beautiful but natural everyday eyelash look with a nice length and no clumps. As Benefit says “ditch the curler”, I think for a more fluttery lash, the curlers are necessary but tbh they definitely do hold a curl with a couple coats and no curler!


L’Oréal Telescopic Mascara

IMG_1785Screen Shot 2015-08-06 at 23.40.18

This has got to be my all time favourite drugstore mascara! I used this throughout the whole of secondary school and it’s one of the biggest mystery’s to me why I didn’t repurchase it when I ran out! But alas, we’re reunited and it’s come back with three different versions! Honestly the classic in the silver packaging was my fave but I couldn’t find that one in Boots so purchased the gold instead! It’s just as good really except the wand is bendy which can be annoying at times. Anyway, the results are amazing, this mascara makes your lashes HUGE and it lasts all day with no flaking! It’s super lengthening and really fans out my lashes. My eyelashes are close to looking fake with this stuff and I’ve been asked many times if I’m wearing falsies! This is definitely a must have in your make up bag!


Lancôme Grandiose Mascara IMG_5880Screen Shot 2015-08-06 at 23.06.29

Firstly, I’d just like to say, I’m absolutely completely in love with every aspect of the packaging, especially the angled wand. I have loved the original Lancôme Hypnose for a while now and I wanted to try another which i’m so glad I did. The Grandiose is so intensely pigmented and leaves great volume and zero smudging! It’s great for lengthening and after 2 or 3 coats the results are incredible. I sometimes pair this with the Roller Lash to intensify the look and separate the lashes further.


Too Faced Better Than Sex Mascara

IMG_0190 Screen Shot 2015-08-06 at 23.56.49

I can’t seem to get enough of this one! I mentioned this in my July Favourites post and this mascara is truly incredible!

This has been my go to mascara this month – totally clump free, lengthening, volumising – you name it – it has all the features! It’s really quick and easy to apply, the hourglass shaped wand makes it easier to get right into the root of your eyelashes. One coat and you’re done, leaving my lashes so full and defined! On a night out, I would go for two or even three coats and it literally gives such magical results – I could go on and on…haha It is a bit on the pricey side but it’s totally worth it and another one of those must haves in your make up bag!


Smashbox Hyperlash Mascara

IMG_6740 Screen Shot 2015-08-06 at 23.50.01

This mascara does exactly what it’s supposed to do! It’s totally clump free, long lasting, lengthening and volumising. It has a synthetic brush with a longer part on one side so you can really get right into the roots of your lashes and separate them out. It even really helps at separating the bottom lashes for a nice natural, healthy look.  If you want long, black, separated lashes then this is totally the right mascara for you!

What I love most is how precise you can be wit the wand and you can go over your lashes as many times as you want without them getting clumpy, just sky-high and beautiful! Another plus for me is that Smashbox don’t participate in animal testing which is so great and more and more brands are now following in their footsteps 🙂


What are your favourite mascaras? I would love to know in the comments 🙂


Sachita x

Avocado – The Super Food you Know you Love!

Hey!

IMG_5670 image7 image3

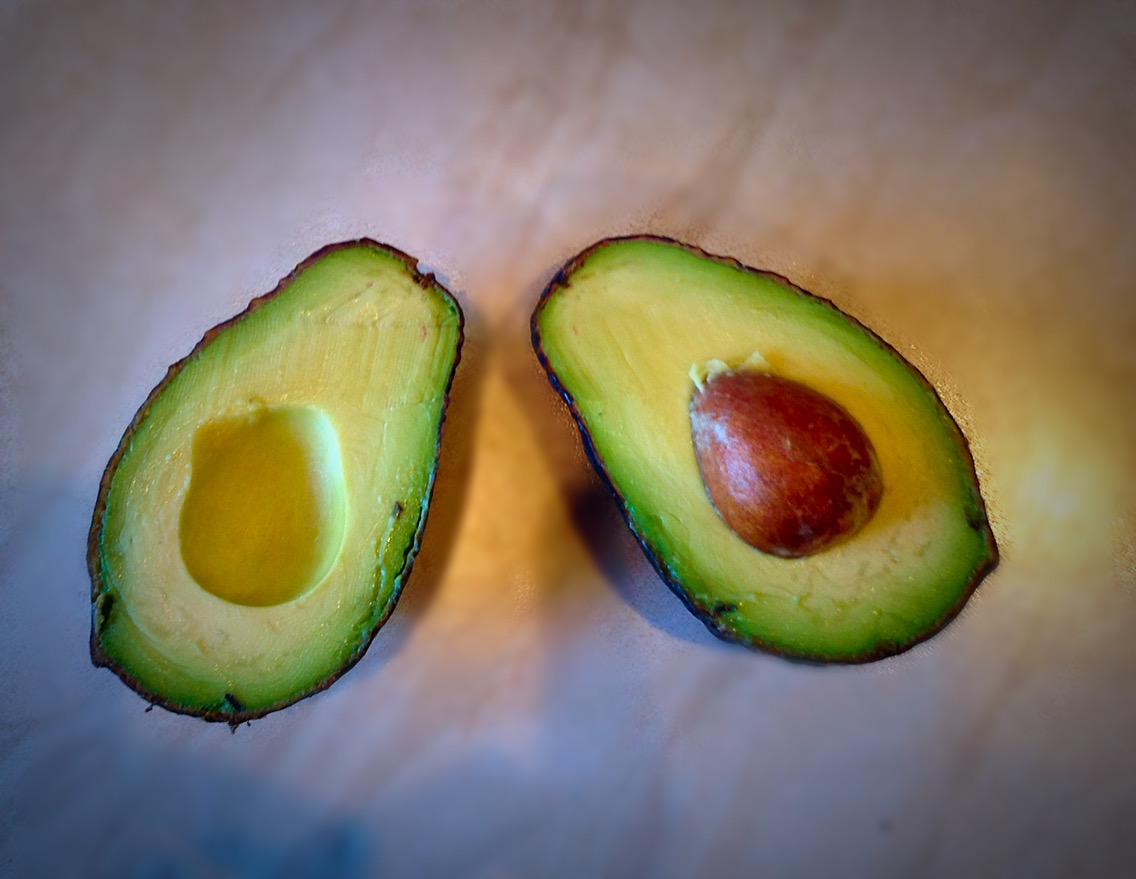
I really couldn’t decide what to write my post on today and as I was having my avocado on toast for breakfast, contemplating the 8 hours of work ahead of me (LOL!), I had a moment to really taste the incredibly nutritious super fruit and it’s super creamy, succulent texture and thought why not write my post on avocado?!

So here goes…

I’m going to mention the different ways I adapt avocado into my diet and some of the great benefits it has to offer.
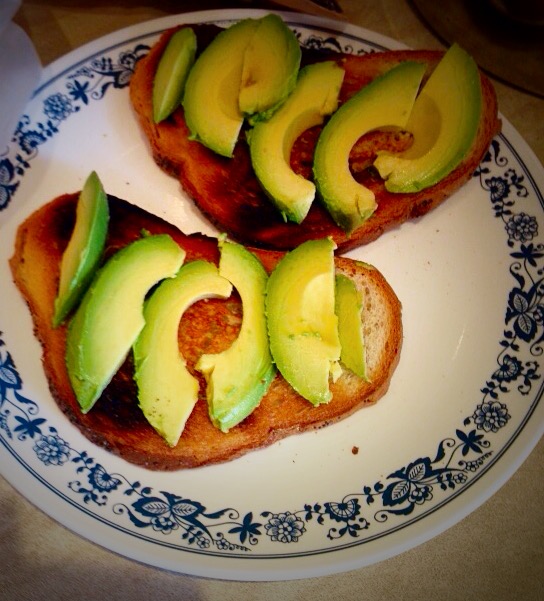
image6

Avocado on Toast

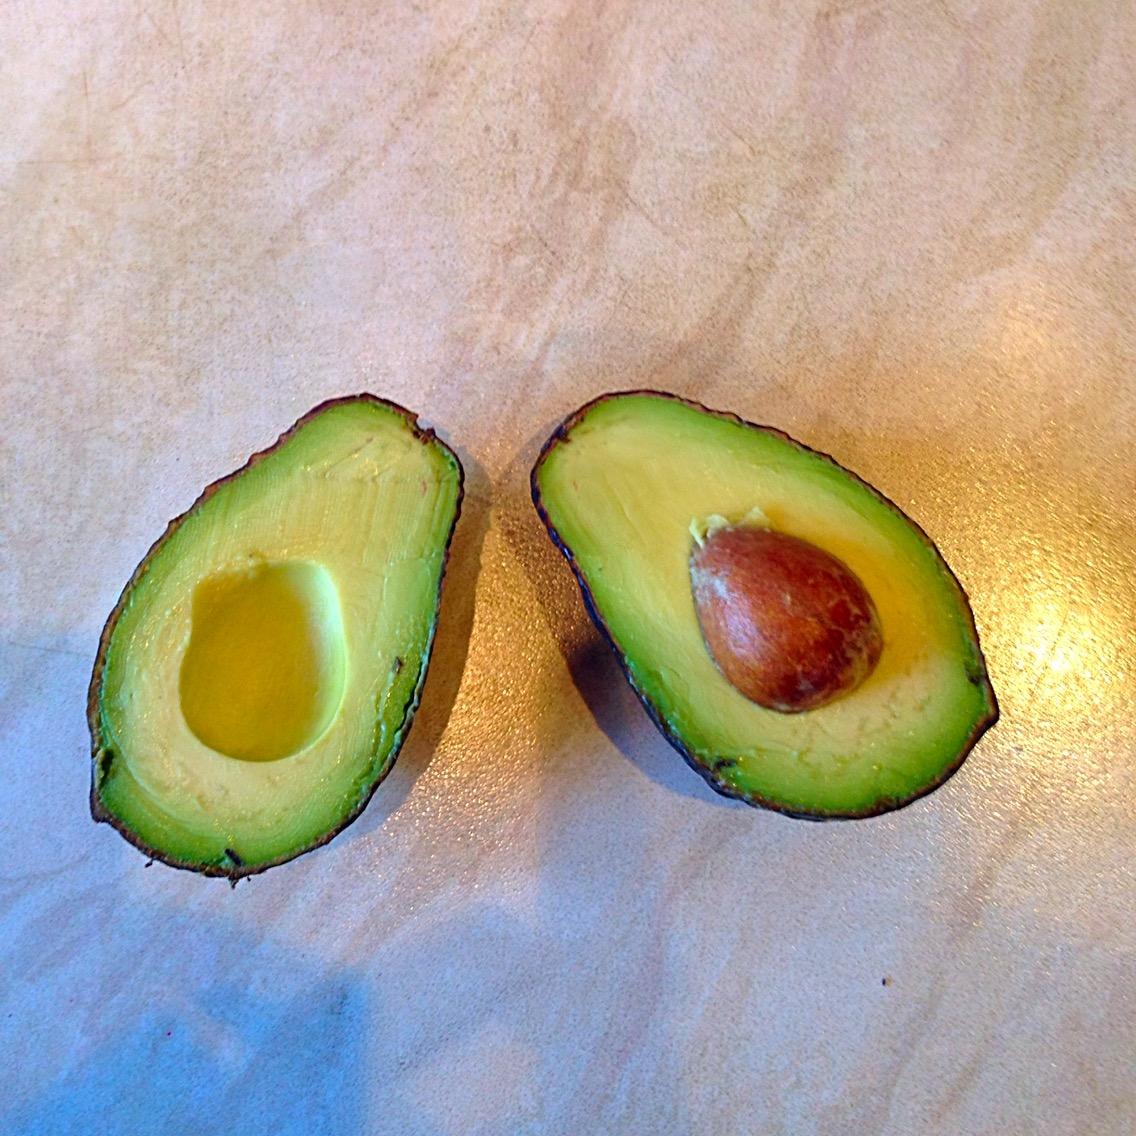
Avocado on toast has been my go to breakfast meal for a few months now and it tastes amazing – It’s even nice for a day time snack 🙂 It’s so quick and easy to prepare and with a sprinkle of salt and pepper on the top, it gives it that extra kick. It’s not super filling that you can barely move – in fact it’s just the right amount to get you going for the day. Just slice that avocado in half all the way around, twist it to separate the two halves, pop the seed out, slice and scoop it onto your toast!

I usually have this with a glass of milk in the morning or a healthy green smoothie 😛

image2

The Green Machine

Another one of my favourite everyday health kicks. I love a rich green smoothie to start off the day! My mum and I have been making fresh juices for a few years now and I can’t express how amazing the benefits are; to your skin, to your hair, general health, it even gives a great energy boost.

Throwing in half an avocado to your fresh juice can turn it from a watery, layered juice to a rich, creamy smoothie. I also add spinach, kale, broccoli, coriander, apple, lime, orange, chia seeds and a spoonful of honey. I know the combination doesn’t sound too appetising, but it’s honestly delicious!

With this combination of fruit and veg, not only are you drinking your way to five a day but also gaining that top nutrition from the vitamins and minerals that are packed in.

 Avocado Hosomaki at your fave Sushi Restaurant

IMG_5665

IMG_5663

As i’m vegetarian, raw fish sushi has never been an option for me so thank god for the vegetarian Hosomaki and Makizushi, which have always been my main order at any sushi restaurant. Nevertheless, some even say the vegetarian option is much better than the fish haha. I love that there’s the option of avocado Hosomaki and Makizushi (California roll), they taste amazing and dipped with a bit of soy, it tastes fantastic! I also love the cucumber and asparagus hosomaki. The best i’ve had has got to be at Gilgamesh London.

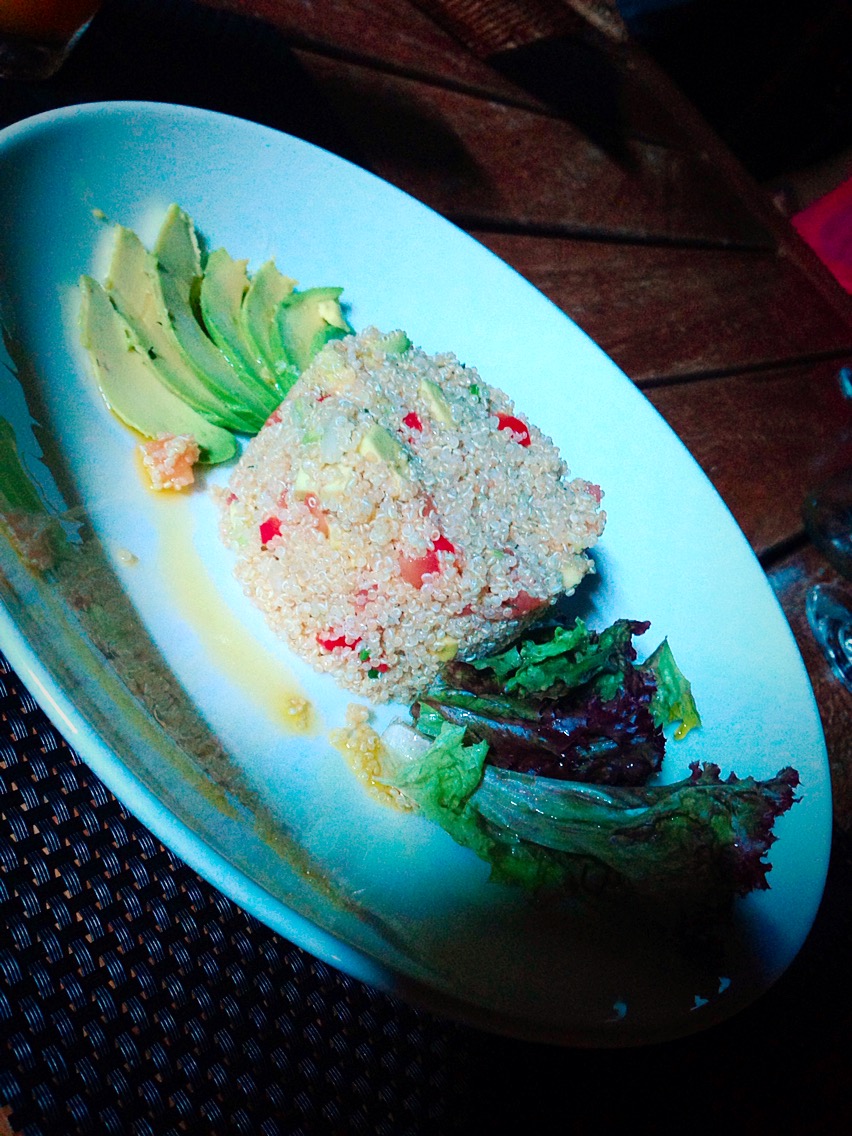
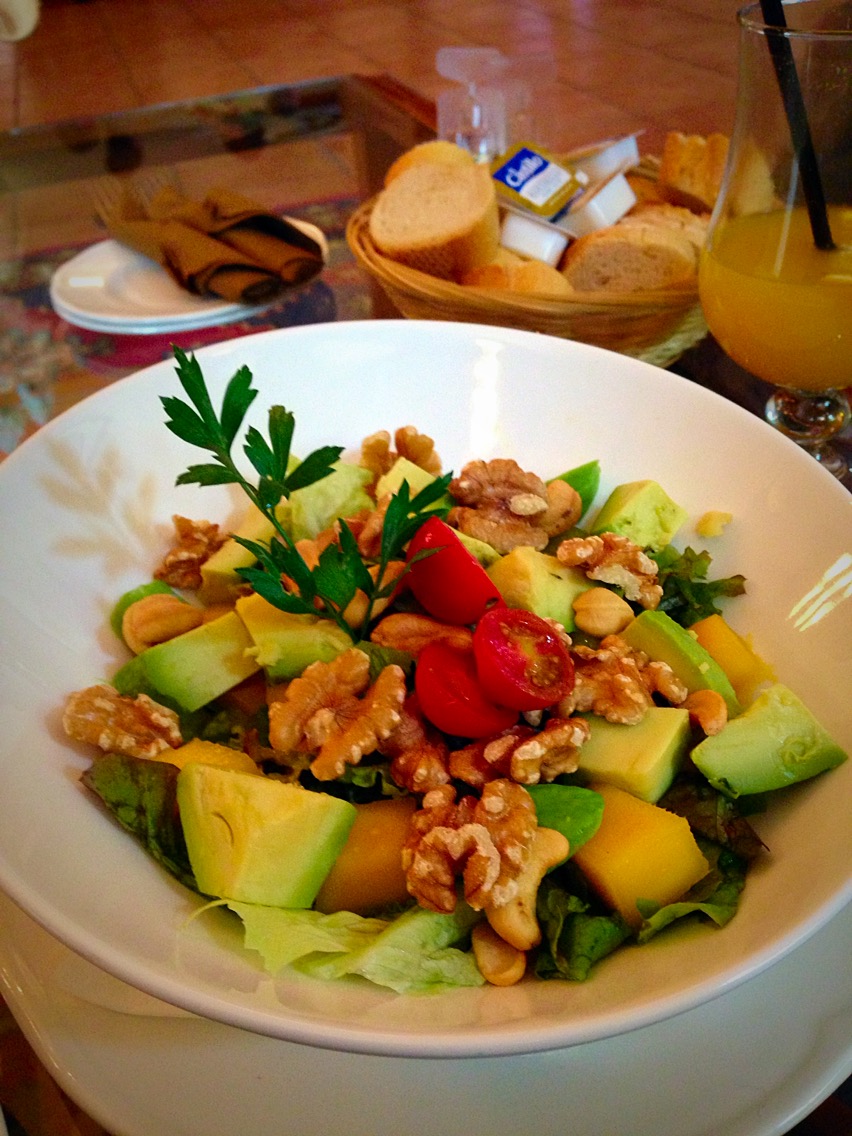
Mango and Avocado Salad

IMG_5669

I tried this mango and avocado salad in Spain last Summer and omg, let me just tell you, the avocados in Spain are DE-LISHHH! They are so much bigger, creamier, richer and sweeter than the avocados we get in the UK.

This salad was so tasty! It also had spinach, lettuce, tomatoes and walnuts with honey and mustard dressing to top it off.

So if you don’t like to juice it, make a salad! The mixture of flavours all in one is irresistible.

Avocado is so good for your skin too – It helps with acne scaring, balancing skin tone, replenishing and even hydrating your skin!

In your sandwichesimage3

Whether it be at afternoon tea or in your sandwich at lunch, avocado tastes amazing in a toasted or a non-toasted sandwich. It acts as a substitute to cheese in some ways, with the same creamy texture but less of the calories and more of the nutrition.

Avocado is rich in Potassium – this will reduce the risk of high blood pressure which can lead to prevention of strokes and kidney failure.

Even though Avocado is a high fat food, the fat it contains is oleic acid which is also found in olive oil and has been linked to reduce inflammation. Avocado has been proven to lower total cholesterol levels significantly.

Avocado has also been proven to prevent cataracts in the eyes.

It’s amazing for your hair and skin too! – I’ve often made face and hair masks with avocado – it leaves your hair and skin super soft and hydrated. It’s a must try for a DIY mask. Have a look below at how I create my masks.


Avocado and Honey Face Mask

  • 1/2 Soft Avocado
  • 1 Tbsp Organic Honey
  • 1 Tbsp Natural Yoghurt

Mix & leave on for 10 mins


Avocado Hair Mask

  • 1 Soft Avocado
  • 1/4 cup Olive Oil
  • 1 Tbsp Lemon Juice

Mix & Leave on for 10 mins


Avocado has such amazing benefits – I’ve noticed some great changes to my skin and health since adapting avocado into my diet, my skin looks brighter, less scaring. I get less tired and have a greater boost of energy throughout the day!

So guys, if you haven’t done any of the above already, start today! You’ll thank me later 😛

Sachita x

July Favourites! ❤️

Hey! I would usually do a favourites video but this month I thought I’d mix things up a bit and write a post on what I’ve been loving in the month of July! Most of my faves this month have been make up related with one or two beauty products too! What have you been loving this month? It would be great to know in the comments 🙂

IMG_4462 IMG_4741 IMG_9357

1) So my first favourite has got to be the Make Up Forever HD Foundation, I’m in the shade N173. I know this isn’t a new product in the beauty market but it has only recently come into my possession when I purchased it at IMATS London (now sold in Debenhams, UK) – and I absolutely love it! It’s a medium to full coverage foundation and covers up any scars or blemishes with ease. My go to foundation before this one was the MAC Studio Fix Fluid in NC44.5 which I still love but this MUFE HD is right up there with the MAC SFF! The colour matches my skin tone perfectly and as it’s HD, it photographs beautifully 🙂 I love to apply this foundation with my Sigma 3D HD Kabuki Brush – the ridge is great to apply liquid foundation and allows you to access every crease, curve and angle on your face!

IMG_0210

2) Skindinavia -The Makeup Finishing Spray Oil Control and Skindinavia – The Makeup Primer Spray Oil Control

I’ve had my eye on these forever and when I saw them at IMATS I knew I couldn’t leave without them! I use the primer spray everyday before I start my make up and it sprays on like a light shower of mist over my face (which is great to wake me up for an early start at work, haha!). The finishing spray is slightly more of a spritz when sprayed but after a couple minutes, you can really see the difference before and after. My make up looks a lot more levelled and blended together, the spray is more magical than a buffing brush! I purchased the oil control as i have combination skin and I tend to get quite oily around my T-zone throughout the day. These sprays have been so great at controlling the oil around my T-zone and also for keeping my make up on and in place for the whole day! They’re amazing! Skindinavia produce the Urban Decay Setting Sprays which I also love and are more readily available so don’t worry if you haven’t got your hands on these yet – the UD ones are just as good! 🙂

IMG_2951 IMG_5600

3) Too Faced – Better than Sex Mascara

This has been my go to mascara this month – totally clump free, lengthening, volumising – you name it – it has all the features! It’s really quick and easy to apply, the hourglass shaped wand makes it easier to get right into the root of your eyelashes. One coat and you’re done, leaving my lashes so full and defined! On a night out, I would go for two or even three coats and it literally gives such magical results – I could go on and on…haha It is a bit on the pricey side but it’s totally worth it and one of those must haves in your make up bag!

4) INGLOT Face Blush – Shade 41

IMG_9878 IMG_0448

This blush is so nice for everyday! INGLOT have such a great range of colours and it was so hard to choose just one favourite but this has been the one I have been reaching for most this month! It’s a gorgeous matte orangey/red shade and great for summer – it’s so long wearing and gives a smooth application. I usually use the Real Techniques Blush Brush to apply this. It gives a nice healthy glow to the face and paired with the highlighter below, I absolutely love the dimension it creates on my face.

5) Make up Forever – Pro Sculpting Duo – #2 Golden 

IMG_0787 IMG_1305OMG I die every time I open this! Isn’t it gorgeous?! MUFE recently came out with two of these “contour & highlight” duos. I picked the darker of the two as I was instantly drawn towards the stunning golden highlight shade! It blends on the skin so seamlessly as the powder is super finely milled, it almost feels like a cream. To be honest, I use the golden highlight shade far more than the deeper contour shade, just because I find it doesn’t work too well for me as a contour, but as a bronzer it’s great! However, I would repurchase just for the highlighter! I wish MUFE would make a new compact just of the highlighter shade – it would be killer!

6) NYX Wonder Pencil – Medium

IMG_7921 IMG_3737

I’ve been longing for the right nude pencil to brighten my waterline for ages now and haven’t been able to find the perfect one in the drugstore – until this one! The NYX Wonder Pencil comes in three shades and the medium is so perfect for me! Claiming to brighten, line and conceal, I mainly use it to brighten and it really brings out my eyes with a pop! I tend to use this for more of an everyday look, paired with some smudged-out bottom liner and of course, Better than Sex mascara by Too Faced.

7) Kat Von D – Tattoo Liner – Trooper

IMG_8136This liner is so faultless! It’s super smudge proof and long-lasting, with that tiny bristled tip – so precise for that perfect winged liner! It stays on the whole day through rain and wind and even if you rub it with your finger, once dry, it won’t smudge! Amazing right?! If you guys haven’t got your hands on this yet, it’s such a must and one of those make up bag essentials!

8) Milani Baked Bronzer – #06 Golden

IMG_8377 IMG_8334 IMG_1626 IMG_3724

I’ve previously used the Milani Baked Blushes and they’re so pretty on the skin, so I had to give the Baked Bronzers a go too! Mine is in the shade 06 Golden and it also comes with a brush and a mirror under the compact which is super travel friendly! I am so obsessed with this bronzer! It’s more of an evening wear for me – for nights out or dinners, and I have received so many compliments for that sun kissed, glowy look it brings to my face. It can even be used as an eyeshadow and I would sometimes dust it over my lids for that extra glowy pop! So silky and streakfree when applied! Like the Baked Blushes, the packaging on these are to die for!

9) MAC Lipstick – Retro

IMG_6104 IMG_6596 IMG_0799

As you can see, I’ve used this so much! Retro by MAC is probably one of my favourite MAC lipsticks – it’s so so perfect for everyday and it compliments my skin tone so well, without looking to bold! I’m not really one for bold and daring lip colours (only on occasion) and Retro has a satin finish with a browny undertone with a nice hint of berry red – perfect for a dressed up or a dressed down look. I would say it comes into the same category as MAC’s; Brick o La, Spice it Up! and Twig.

10) Elizabeth and James White – Nirvana – Peony for her IMG_5413 IMG_1690

My final favourite for July is a perfume – Elizabeth and James Nirvana White, produced by Mary Kate and Ashley Olsen. I discovered this perfume around a year ago as my friend Ashni (check out Ashni’s blog) had it, and we were talking about a similar perfume which I love – Stella by Stella McCartney. I was telling Ashni that I found Stella didn’t last very long and I was going through bottles like water (anyone else experienced this?)! She introduced me to Nirvana and I instantly fell in love! It’s a gorgeous musky, sweet smell and lasts ages! Unfortunately this particular perfume isn’t sold in the UK so I asked my cousin Aarti (check out Aarti’s YouTube channel) to purchase it for me when she went to New York and i’ve finally got my hands on it!

Thanks so much for reading guys! Let me know your thoughts and favourites in the comments!

Ashni’s coming over for a sleepover now – gotta go prepare the popcorn haha 😛

Sachita x